here’s my take on the swing arm lubing procedure. Apologies for the shite iphone pics.
my bike has 22xxxkm on it, but having read some posts by forum members (yamahasupertenere.com) I figured I’d take mine apart to have a look see. I had to remove my rear wheel for truing (more on that later), so it made sense to go ahead and tackle the work.
Keep in mind this is my take on working on the bike, please use it as information only. I’m not going into specifics on how to take the rear wheel off, re-assembly etc.. just specifics that I found while working on the swing arm (s.arm)
- Remove the rear wheel.
- Loosen the 4 bolts that hold the final drive pumpkin on,
- Hang the rear brake caliper, aluminum arm (not sure about the name, but the one that holds the caliper to the swing arm. There’s two small mounts on the right side of the s.arm, that need to be taken out

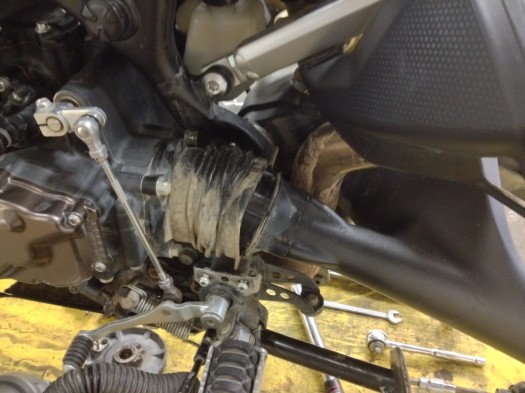
- Remove the pumpkin. The shaft will slide out, as one part, note the nice little rock that founds its way into the swing arm

- Remove the exhaust
- At first, I left the rear shock in, but after having to struggle with the re-assmebly of the s.arm, I recommend removing the shock for easy of work.
- Remove the swing arm links,
- At this point, work the end of the rubber boot off the swing arm, the yamaha manual says to remove three bolts within the swing arm assmebly, no need for that (the three bolts are to the right of the boot, inside the s.arm, not really sure why the book says to remove them. The enitre s.arm can stay as one assmebly).
- Remove the heel guards on both sides
- you will see a 27mm bolt on the right side of the bike
 this holds the s.arm in place. remove the bolt, take swing arm out of the bike. I found very little in the way of grease, I took the end plates off the s.arm (silver bits at each end)
- cleaned up the existing grease, pulled out the spacer cleaned it, regreased the whole thing, and slapped it back in.
- As an interesting side note, my rear shock was leaking oil, I wasn’t sure if it was from the seal around the rod, or the shock body, so I simply tightened up the bottom collar and re-installed it. Maybe it’s time for one of those shock booties, I’ll check it next winter, and report back.
- After the swing arm is in. re-install the shock through the right side of the bike (you will need to remove a small allen key that holds the lines, and a guide bracket, to slide the shock in.
- links can go back in, torque everything to spec, exhaust back on.
- The rubber boot was a bit tricky to put back on, to help it slide on easier, I sprayed some windex both on the boot, and on the s. arm and it went on with no issues.
- Pumpkin can go back in, make sure it engages with the output shaft.
- Line up the pumpkin, install the rear wheel, re align the pumpkin and torque everything to spec.
- Test the final drive, test your rear wheel to make sure everything spins freely and properly. Test the rear brake for proper operation


Now, the bit about my rear wheel. Last summer, after washing the bike, I checked my rear spokes, all was well. Two days later, riding the bike back from work, I noticed two spokes gone. No damage to the swing arm, the spokes unthreaded, and f.off. So I got me some replacement spokes from one of the forum members, re-installed, and re-torqued to spec (6 lb I think). at the time I was running a shinko 705, with no issues.
Recently I installed a K60, and noticed the rear to be quite bouncy, so naturally I attributed the fault to a out of round wheel. I had a friend of mine check the wheel for trueness, it was a out a bit from left to right, but it turns out my K60 is actually out of round. So off comes the tire, back to the dealer for warranty. New tire to go on next week.
