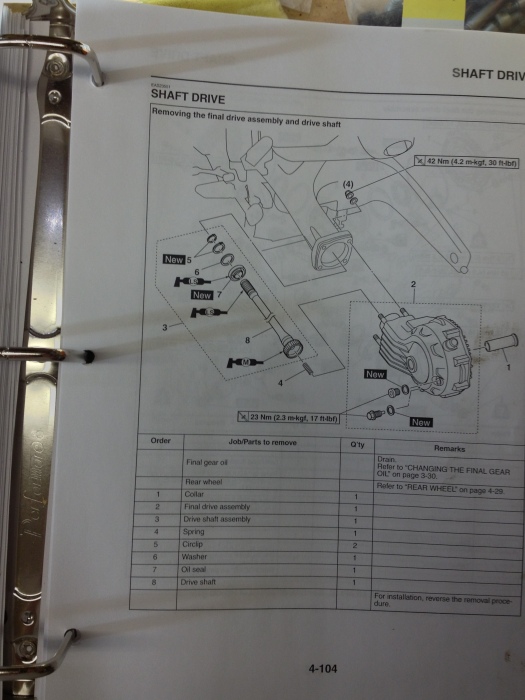
Before I begin…usual disclaimer: This is not a guide. Use at your own risk. I’m a spanner and tend to make mistakes. That said, it all went well once the procedure and ‘special tools’ were sorted out. The Yamaha (aka: Y) repair manual is very important here. Reference pages 4-104 through to 4-118. Not all pages are relevant to the fix. As I only had to sort out the two seals on the shaft, and didn’t have to do anything on the seals on the wheel side.
My blue 2012, has 35000 Km on it. The riding splits up about 60% on road, 40% gravel/offroad, with some water crossing thrown in for a good measure.
I recently pulled the bike to BC for a vacation with my wife and giant brown dog log 🙂
Two days into the vacation, I went for a ride with a friend of mine from SSI, he pointed out that my shaft drive was leaking. Nice. I didn’t bother to get on the internet and find things out, decided to wait the week and a half, and have a proper look at it when I got home. Just to be on the safe side, I bought some gear oil for a top up. The initial leak was very slow. But after 3 tanks or so (1100km) the leak started to really get quite steady.
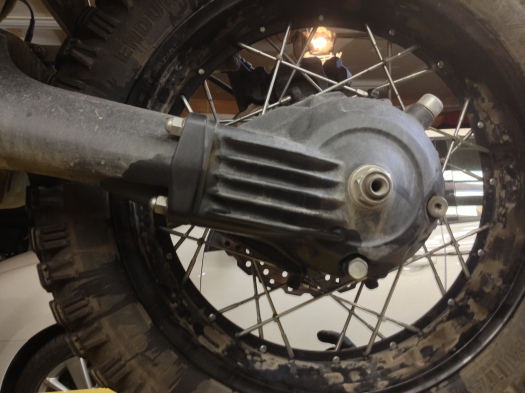
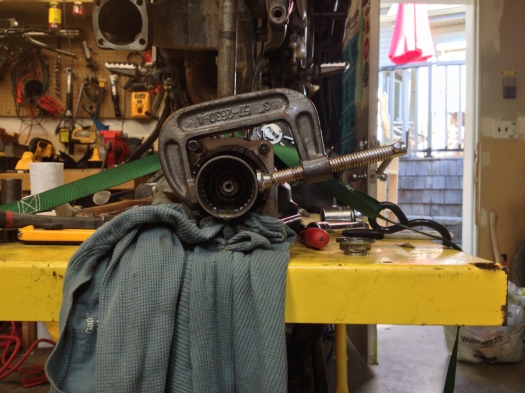
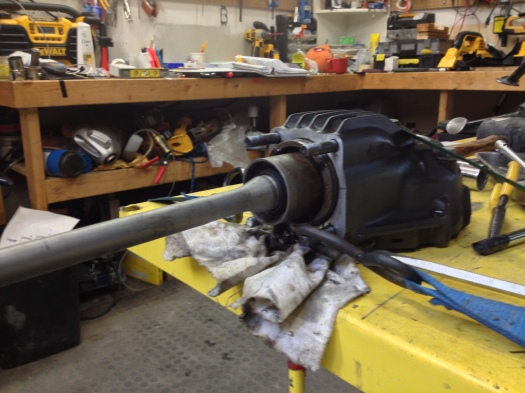
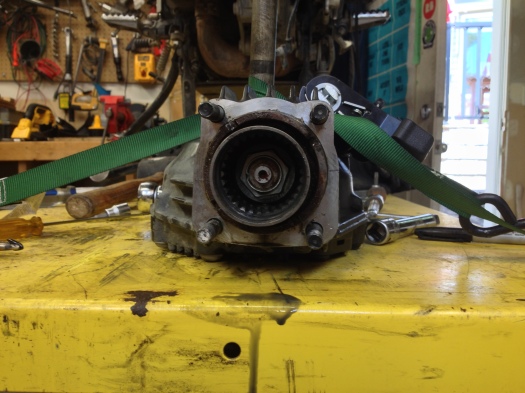
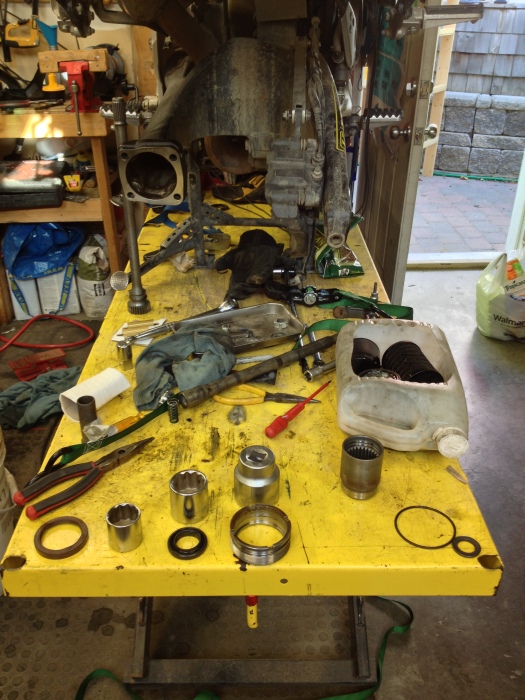
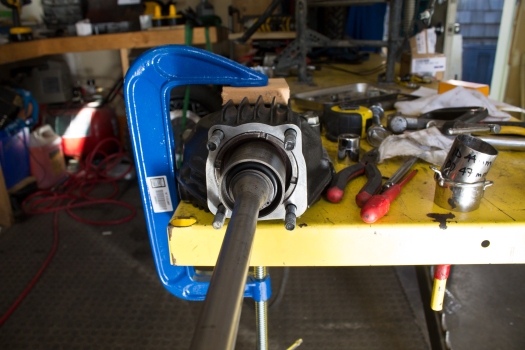
Bike back on trailer, tugged it home, and put it up on the bench. I removed the rear wheel, took a few pictures of the shaft/swing arm, and the pumpking. I originally mcgrubbered the shaft with a ratcheting strap, which thankfully got replaced with a 12 inch c clamp, and a small block of wood.
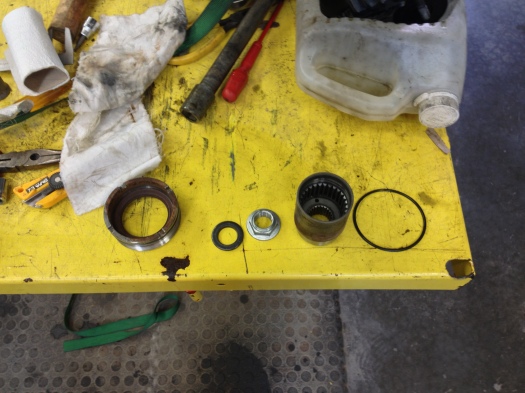
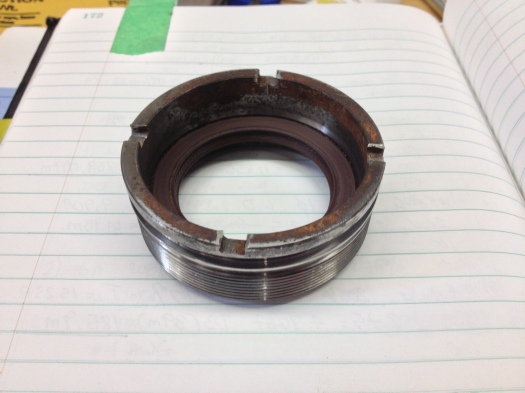
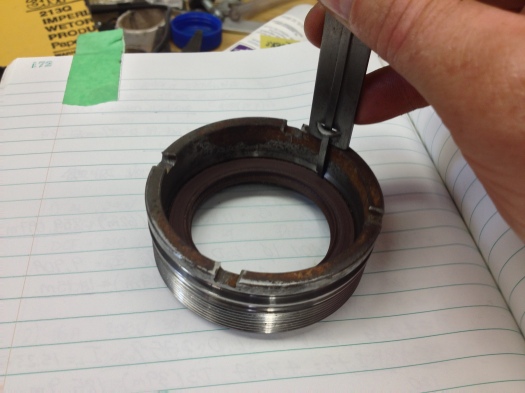
The leak was definitely coming from one of the shaft seals (Page 4-104 Item 7, or Page 4-104 Item 13 (note, Y does not break these out, one is a simple o-ring that goes around the outside of the bearing retainer nut, the second is the seal that sits outside the coupling gear, and inside the bearing retainer nut-SPOILER ALERT! this seal was the culprit)
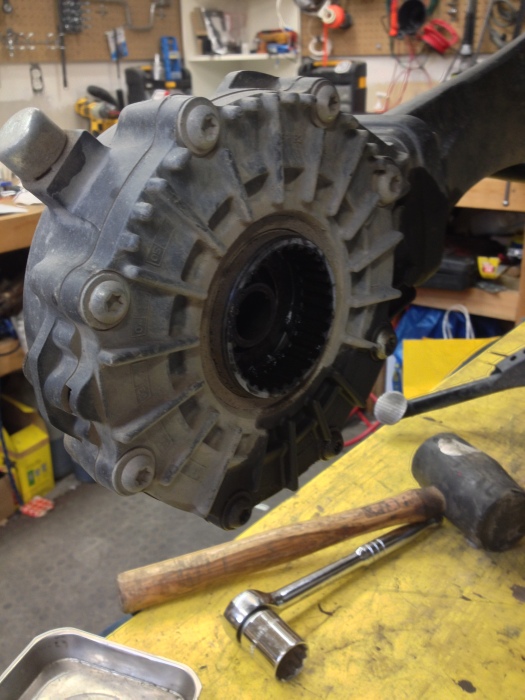
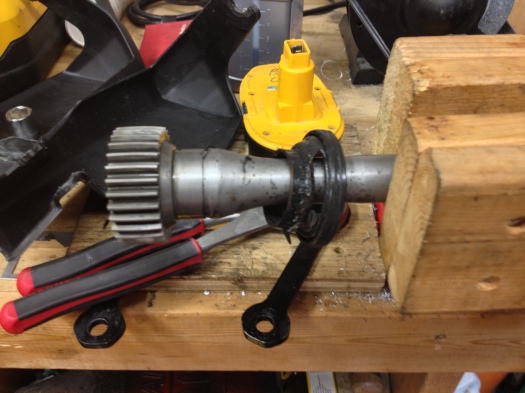
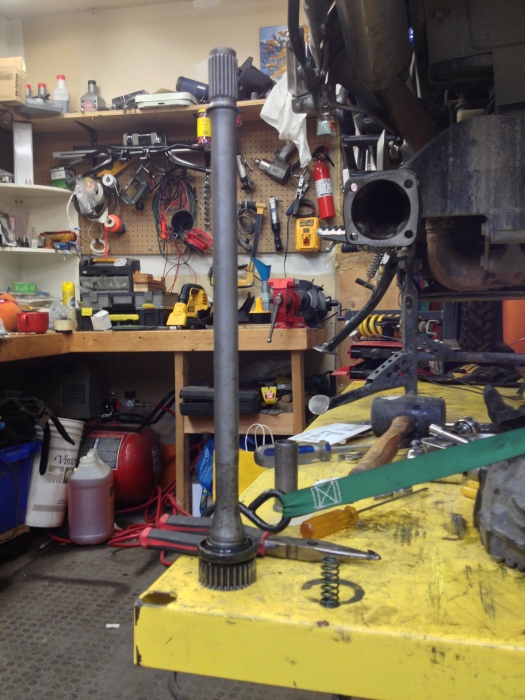
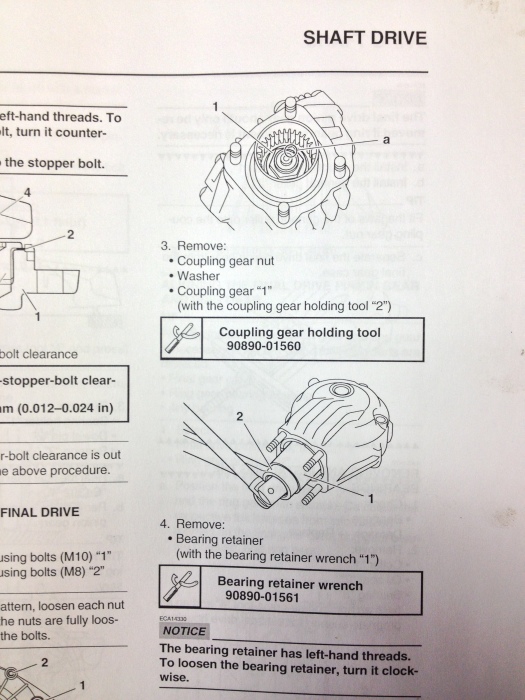
Once the final drive assembly (aka: FDA) is out, the drive shaft (aka: DS) has two snap rings (circlips). one at the top of it, one towards the bottom, which holds the washer and shaft seal. Now, being a numptee, I tugged on the DS, in the hopes of the seal letting go, and coming out. It did not. Then I proceeded to skip the instructions of the Y manual, and go directly to removing the bearing retainer nut (aka: BRN). Book calls for a special tool (which I didn’t have, but had a flat blade screw driver, and a hammer. You can fix anything with a hammer!)
As the book states the BRN is a reverse thread. To remove it, go clock wise. So I did. I removed it as far as I could, but still had the DS and seal in place. If you give the ds a proper yank, it will come out. Set the spring aside, clean and inspect the components. As spoiled previously, the DS seal was fine. No leaks, but at this point needed to be replaced, since it was bastardized by me.
Looking inside FDA you can see the coupling gear (aka:CG) nut, and washer. The CG has a punch spot that needs to be straightened out before removal.
Issue one. Y manual calls for a special tool (CG holding tool). The CG spins with the CG nut. So you need to hold one to remove the other. An internet search turned up…..nothing. Either make one, or buy one from a guy in the UK for 250 pounds. Nope, Yamahasupertenere.com (aka: YST) to the rescue. Impact wrench, and a small c clamp around the CG for good measure. Off it went. Easy!
At this point the CG and bad seal were out. Next issue: Parts. I called around, and no one in Calgary stocked the parts. 4 weeks delivery from Japan. YST to the rescue again. Not only did two members come forward in offering the two seals needed (thanks again Bernie from Victoria), but I also managed to scoop up the last two full sets of seals, and o-rings in the US (cheapcycleparts.com) They shipped out yesterday from the US and should be here by end of week.
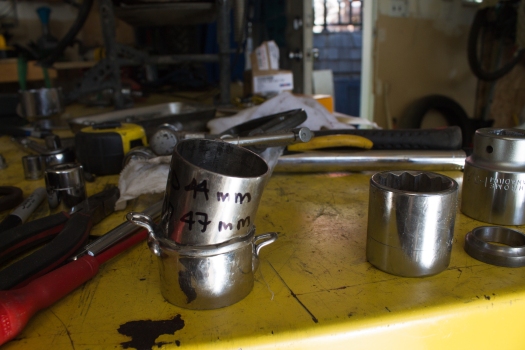
What I was surprised by is how much surface rust the CG had on it. I cleaned it up, and sent it off with Camshaft, and I 2.1.4 inch socket to get machined for my special tool (Note: this is after I had my light bulb moment, that with a proper tool, the job would be easier, and done right)
I cleaned all the parts up nice nice!!, and waited for the parts to show up from Bernie. I ended up reusing the o-ring on the outside of the BRN, and installing the new seal inside the BRN. I used a socket of the proper ID to drive the new seal in. That done, I greased the CG and o-ring, threaded it in (ccw!!!) by using the new tool. Torqued to proper spec.
I then proceeded to install the CG carefully (remember it goes on the inside of the new seal. Install the washer (the out writing facing, wait for it..facing out), install c-clamp around CG, break out the impact, and impact away. Now the book calls for 108 LB, the impact gun got close to it..I think.
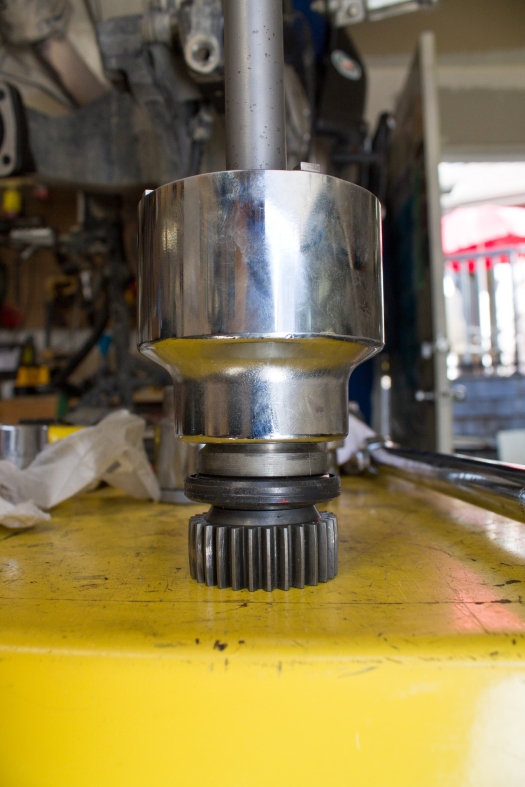
On to the SD, and related seal. The SD seal will need two different diameter drivers to get installed (one for the SD, one for the CG). Slide the seal on, and washer over it. I found a suitable bearing race that I had kicking around, and a socket (size escapes me right now), and drove the seal on to the SD. Once that’s done, the seal and SD needs to be installed into the CG (don’t forget the spring!). For this driver I used my left over staintune pipe. Right diameter, and proper weight. Worked like a charm. Snap rings on, shaft back in swing arm, install wheel caliper, associated bits, bolt/torque wheel (90 ft-lb If memory serves) do up FDA nuts, check all bolts/nuts, fill with oil, go for a drive, and listen for loud clunks 🙂
My breather did leak out a bit of oil (probably because the FDA was on its side/upside down a few times), otherwise she’s bone dry.
I have a spare set of seals (and two o-rings now) Which I plan to use on an exchange basis with YST inmates as they need it. I’ll send you my spare set, the inmate orders a new one, and sends those back to me.
Re-assembly was straight forward. Mainly because I figured out how it all goes back together, the special tool made up by Camshaft’s son for the BRN.
Granted the impact and c clamp are a bit bush league, but they work. Pretty sure the dealers go the same route.
I have a suspicion that this will become a maintenance item. If you ride offroad, gravel, streams etc..the grime and gunk collects at the bottom of the shaft drive, and since the BRN is stationary, the seal that sits between it, and the CG seal will eventually let go.
So to sum up. You will need a proper BRN tool machined or made up. It will make life easy, and get the proper torque to hold the bearing in. The seal drivers can be sorted out easily enough with different socket sizes. The CG nut can come on and off with an impact gun, the c-clamp helps a bit. I expect to do this again in about 35 thousand KM.
Update October 2015. I’m at 69 thousand km. No signs of leaks. The culprit was the swing arm plug, and nothing else. Check your plugs gentlemen!
link to parts page: http://www.yamahapartspro.com/oemparts/a/yam/5004d842f87002275461de7b/drive-shaft
And the parts that you may or may not need:
Number #14 on parts page: 93102-50009-oil seal for main shaft. This will only give you trouble if the plug falls out…
Number #39 on parts page: 93108-49003-00 only needed if you’re not ginger with the original seal
Number # on parts page: 93210-69628-00 O ring for retainer bearing. Can reuse old if needed
Number #21 93211-54698-00 Inner O ring
Pics below:
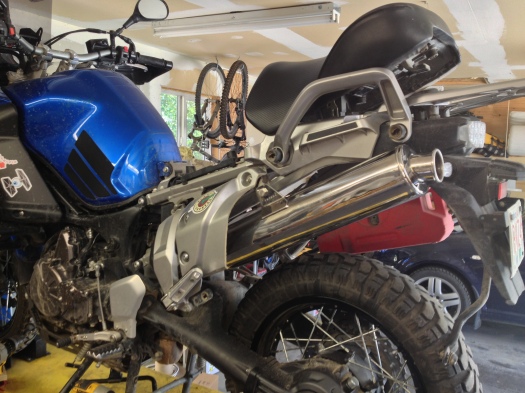
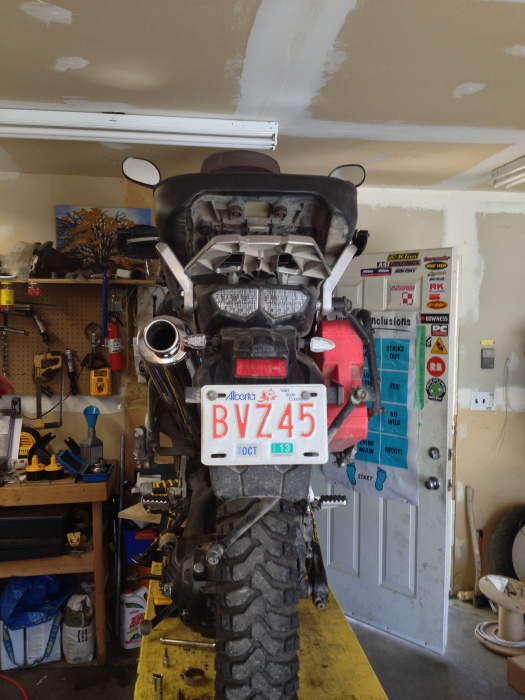
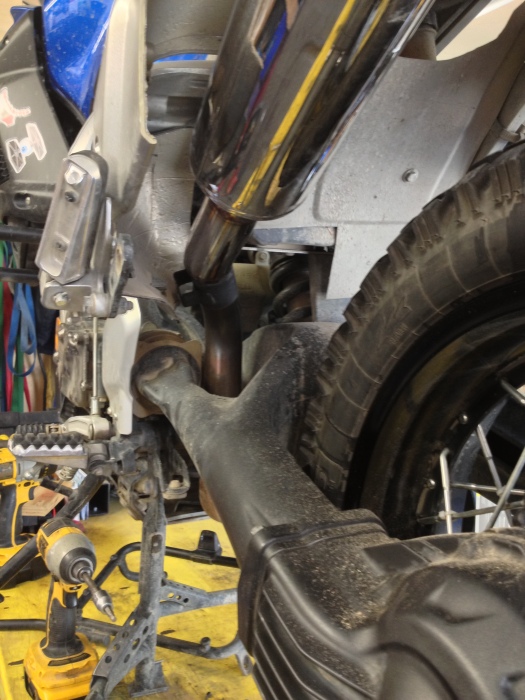
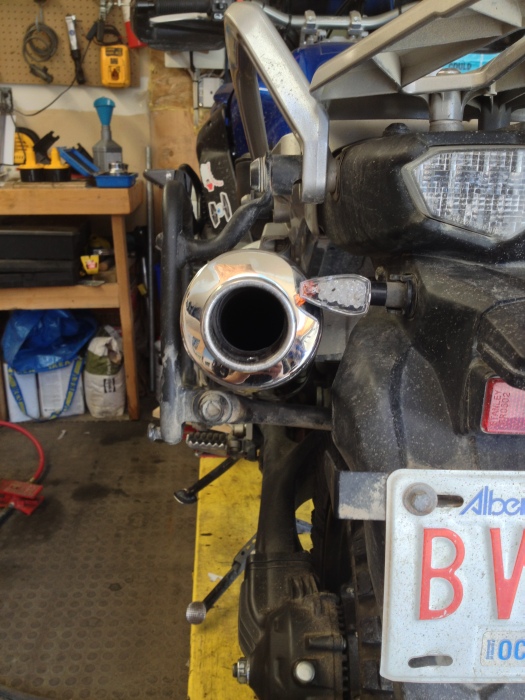
Staintune pipe fitting
I’m on my second aftermarket pipe. The first one was an early purchase in 2011 when I first got the bike. Brand was ART. Left a bit to be desired. Cut my losses and sold it to my buddy Wade.
Next up was my two brothers. Decent pipe, but a bit loud for my taste, and needs repacking.
Having previously ran Staintunes on my DL1000, I followed Dave6’s lead, and purchased a second-hand pipe. Cut it up, trial fitted, and sent it off to Dave6 for welding.
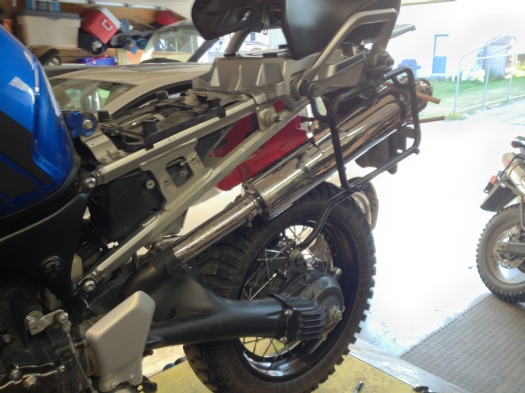
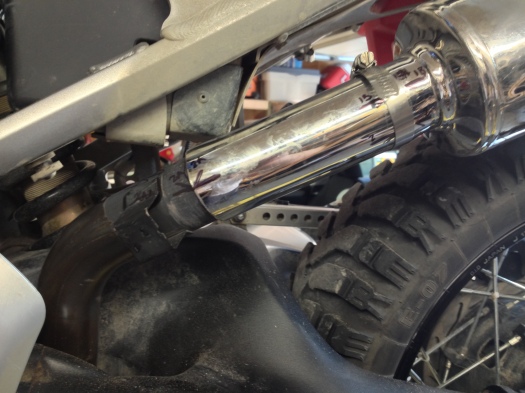
The Staintune was from a Triumph 955. I used part of the stock pipe (clamp, and part of the pipe), the rest was from the staintune. I wanted the new pipe to clear the rear of the bike, and exhaust straight out, not down, where it would melt my Givi bag (thank you ART pipe), or one of the turn signals, or fender (again, thanks ART)
After trial fitting the pipe, turn signal, and racks, the pieces were marked up, and left with Dave.
I had to get some aftermarket turn signals (ebay cheapies from china).
Result. I’m very happy with the pipe. It’s lighter than the two brothers, will never need to be repacked. With the baffle out, it sounds great. With the baffle in, it has a very nice note, but it’s not loud at all, and will do nicely on longer trips.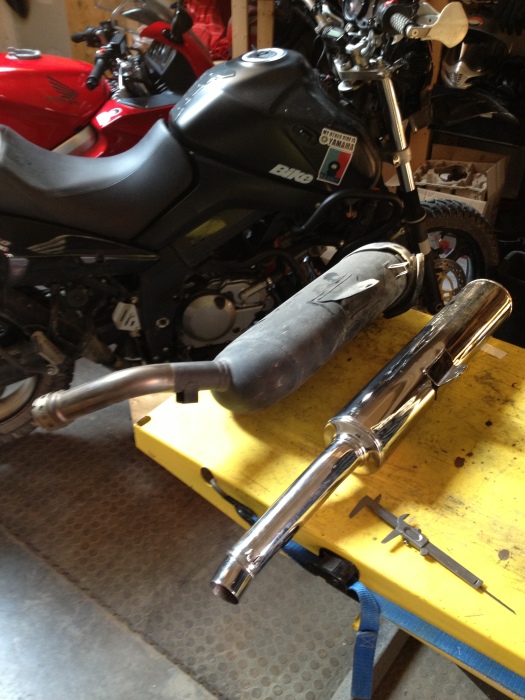

Honda Africa Twin, the cheap and not so cheap add ons – thetenerist
Man you are the best. THANX
lols..thank John, glad I could help.
Hello, I have the same problem with my XT1200 2010 with 65.000 km, I need to dissasemble the coupling gear holding but don’t have the tool, I think I’ll buy a impact wrench, I’d like to know how much power it must have, for example a COMPACT IMPACT WRENCH “https://www.usag.it/catalog/en/products/details/3870/942_PC3_1_2/Compact_impact_wrench” the power is it enough?
Thanks
hi Alessandro, I didn’t get a notification of your post till now. Aplogies. It’s been a while, but I basically used an impact wrench that I had lying around the garage. It was a 1/2 inch drive, so around the 150 ft pound value or there about. If you need anything else, let me know,
thanks,
Greg